This guide has been created for all users in the Edays system.
Specific Role permissions may be required.
Overview:
The latest addition to edays brings working locations, the below guide will walk you through the process to apply Working Locations to your calendar, allowing greater visibility of users and their given location - working from home or a specific off-site location etc.
Step by step guide:
- Log into Edays
- Click on the "Update working location" button
- The "For" field will automatically be populated with your name however you can change the user here by clicking the small pen icon and searching for the user you would like the set a Working Location for.
- Set "Working Location" as needed
- There are two ways you can set the date/s for your Working Location:
- Fixed Date: A single date to mark your Working Location for just one day.
- Recurring: You still select a single date however you also set how often this recurs whether it be every day, twice every 2 weeks or 5 days every 3 months etc.
- "Day Part" is where you configure if you will be working from said location for the entire day, the morning or the afternoon.
- the "Details" field is for you to write any extra details you would like to be noted with your Working Location.
- When done click the Submit button
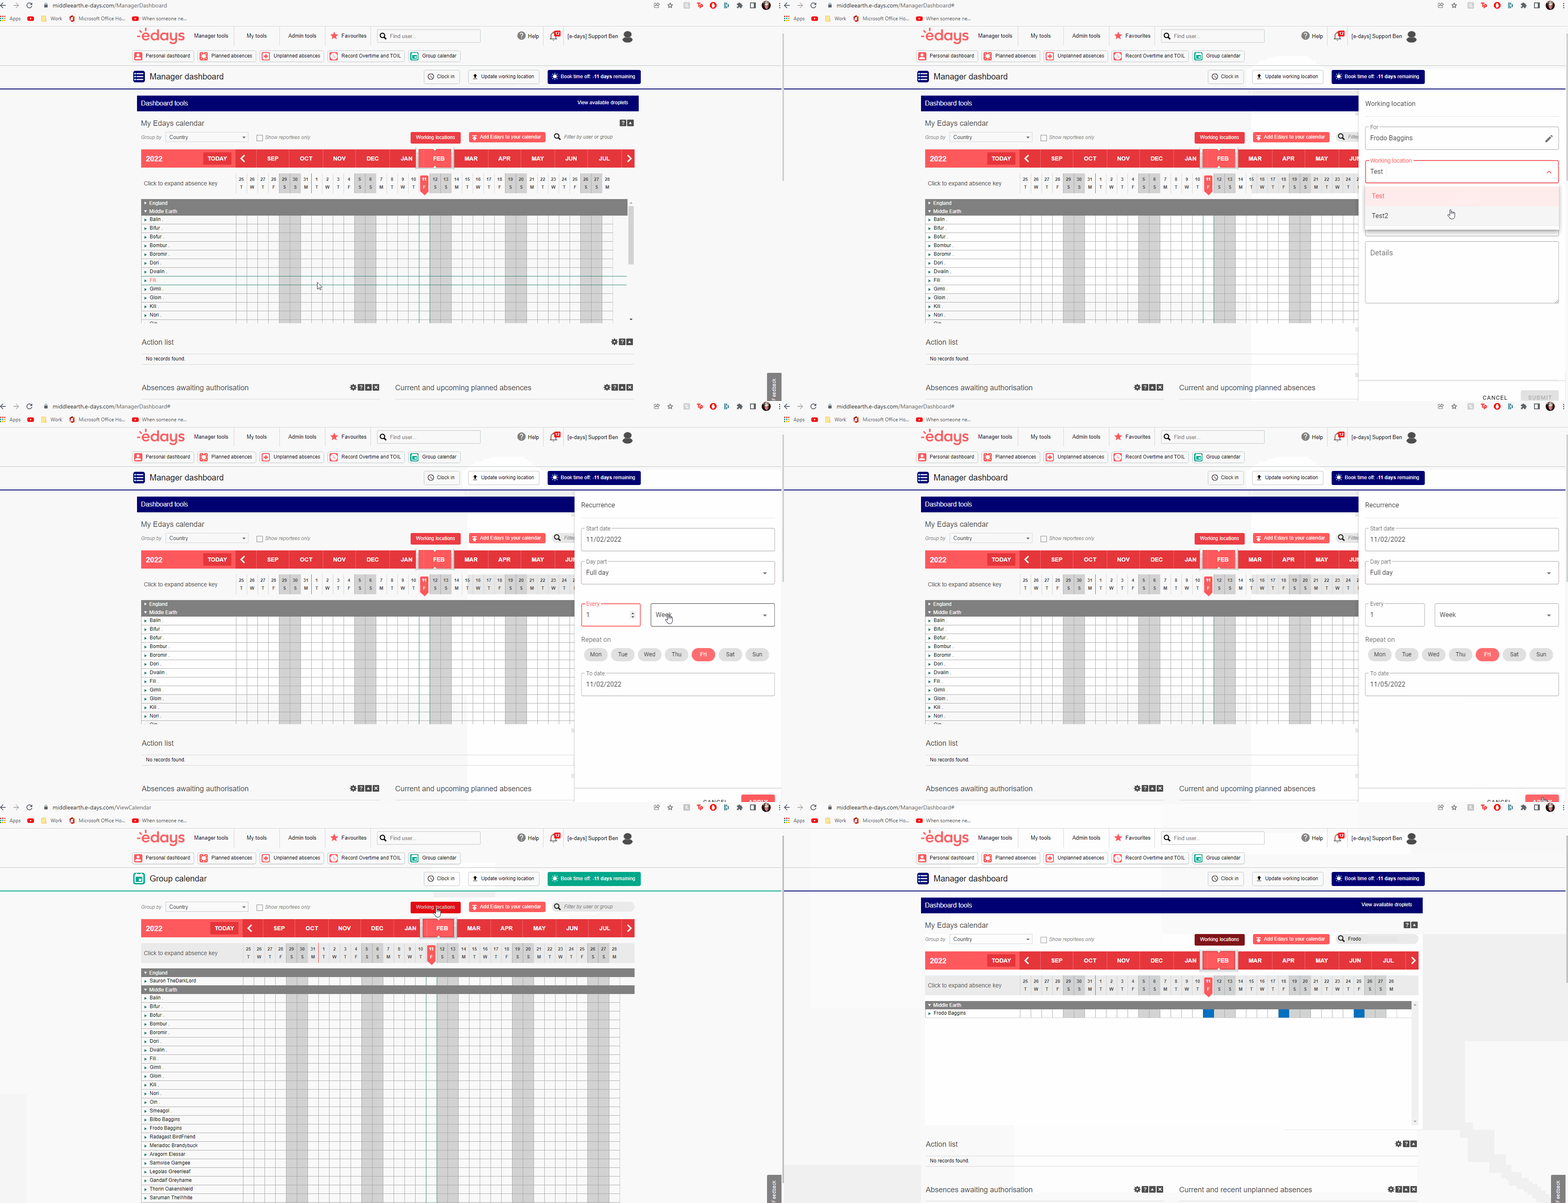
Now you have booked in your date/s for your Working Location you can view them on the Group Calendar and/or Managers Dashboard. To do this navigate to My Tools > Group Calendar or Managers Tools > Managers Dashboard and click the "Working Locations" button.
Note: If you cannot immediately see yourself or the user you set a Working Location for in the calendar please try searching for them using the search box at the top right of the calendar.