Overview:
This guide outlines how to configure and manage the Document Portal in edays, including how to create folders, upload documents, and manage permissions. The Document Portal allows for secure internal document sharing across different user groups.
How the Document Portal Works:
The Document Portal provides a shared space within edays where documents (e.g. employee handbooks, policies, forms) can be uploaded and made accessible to users based on their assigned access tier. Access is controlled via group-based categories and permission roles. From here, you can also assign documents and policies to your staff to ensure they have read and acknowledged any new policies within the business.
Note: The Document Portal is a paid feature. Contact customersuccess@e-days.com to enable Core HR. Once activated, request the Document Portal role permission from the Support Desk if not already assigned.
How to Configure the Document Portal:
1. Creating new folders (Front-End)
On the Front-End of edays, go to My Tools > Document Portal.
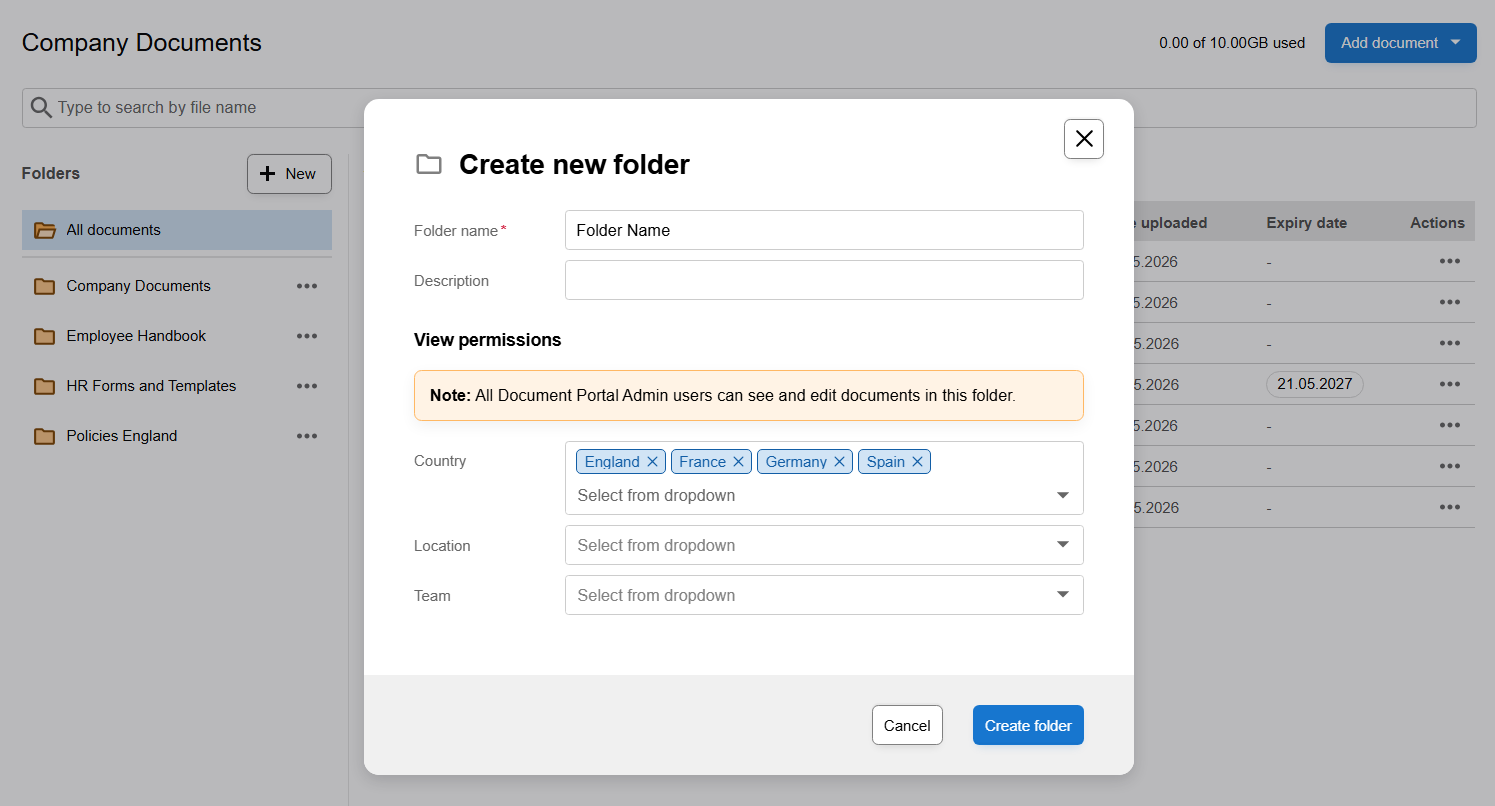
Click +New next to Folders.
Give your folder a name, an optional description, and then select which groups will be able to view documents in this folder. (You can later edit the folder name and groups if required)
Click Create Folder
2. Adding Documents to an Existing Folder (Front-End)
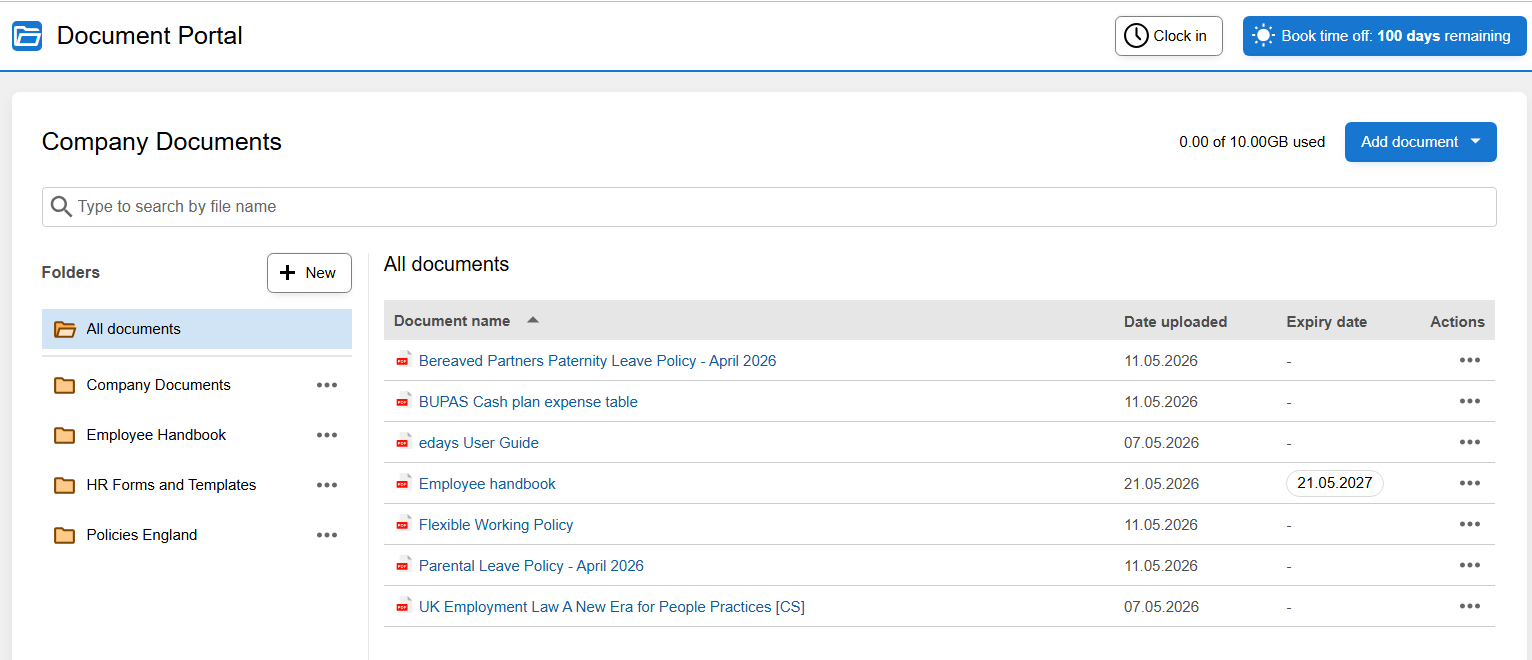
On the Front-End of edays, go to My Tools > Document Portal.
Click Add document
Click Upload File, then you can either select a file from your desktop, or drag and drop your document.
Alternatively, click Add Link and paste a link from an external site such as Sharepoint.
Click Save
3. Edit or Review Uploaded Documents
Go to My Tools > Document Portal
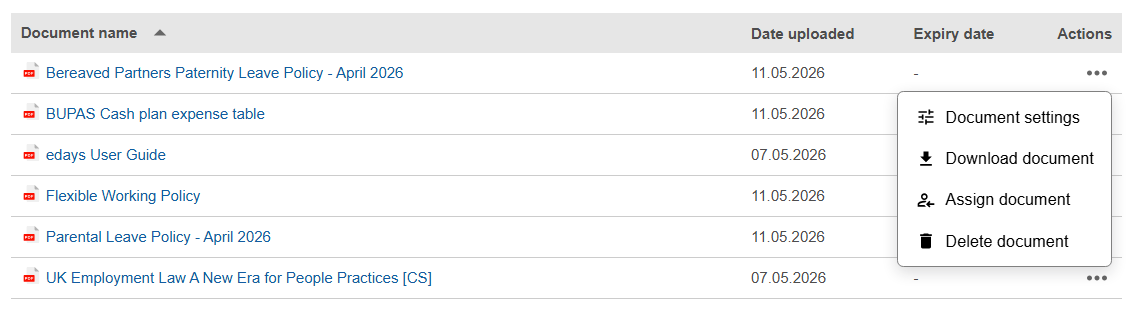
Click ... under the Actions column next to a document.
You can Download document, Delete the document, or adjust Document Settings.
To rename or describe a file, click Document Settings, update the fields and groups, and click Save.
4. Assign a Document
Go to My Tools > Document Portal
Click ... under the Actions column next to a document.
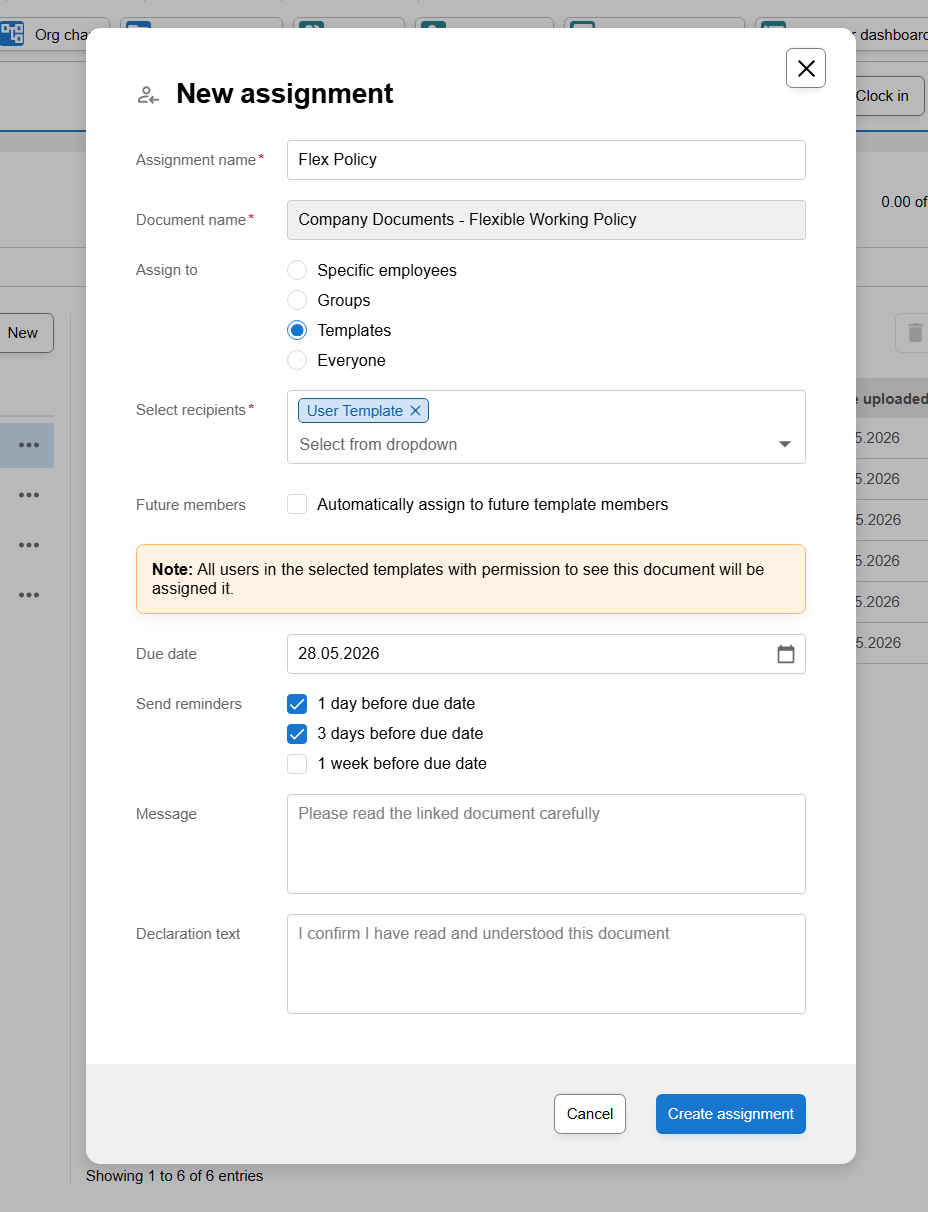
Click Assign document, and from here you can give the assignment a name, select who to assign to, assign a due date, enable automatic reminders, and adjust the relevant messages for your employees.
Click Create assignment to assign the document to your selected groups/people.
For more information on assignments, we have a full guide here.
Additional Information:
Document Portal: Designed for a central employee hub for company wide documents
Requires 'System Admin' role and Document Portal permission to make changes to documents and folders
Only users with the correct permission and tier will see and access the documents.
Use the search function within the platform to quickly find features or settings.