Overview:
The Information tab is where you’ll find and manage everything about your employees in one place – from contact details and job records through to salary history and emergency contacts. Once Core HR is enabled, it appears on every employee’s profile, giving you a clear and structured view of their key information.
This guide walks through each section of the tab, explaining what you’ll find there & what you can edit directly.
1. Permissions & Access
2. Information Tabs
3. Employment Details
4. Compensation Details
5. Audit History
6. Custom Fields
Before You Start: Checking Your Permissions & Access:
What you can see and edit on the Information tab depends on the permissions attached to your role in edays. If you’re finding that the tab isn’t visible, or that fields are greyed out when you’d expect to edit them, it’s likely a permissions issue rather than anything you’ve done wrong.
- View the Information tab – you need the ‘Staff record information tab’ permission to see this tab on other people’s profiles at all.
- Edit information – the ‘Staff record information tab editor’ permission lets you update fields on other people’s profiles. Without it, everything is read-only.
- View salary data – the ‘Sensitive data viewer’ permission is required to see compensation information. This is intentionally restricted and should only be assigned to those who genuinely need it.
Not sure about your permissions? Speak to edays, who can check and advise on your role settings.
Finding Your Way Around:
To access the Information tab for any employee:
- Go to My Team and search for the relevant employee.
- Open their profile and select the Information tab.
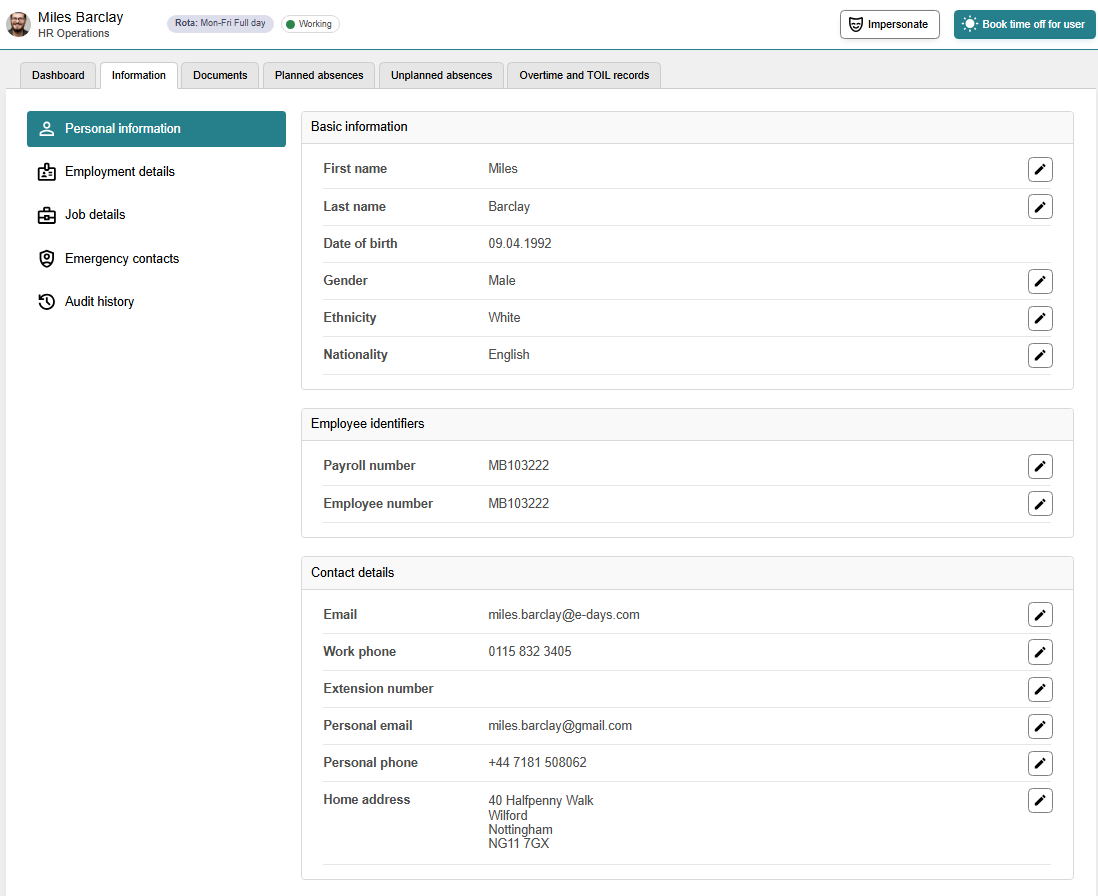
The tab uses a left-hand sidebar to navigate between sub-sections. You’ll find the following sections listed:
- Personal Information
- Employment Details
- Job Details
- Emergency Contacts
- Audit History
At the bottom of the sidebar, an Important Dates panel displays key upcoming dates for the employee, where these have been set:
- Probation end date
- Visa expiry
- Work anniversary
- Birthday
Throughout the tab, any field that can be edited will show a small pencil icon to the right. Click it to edit inline, then use the Save icon to confirm or X to cancel.
Personal Information:
This is the core section for storing an employee’s personal details. It’s split into three groups, and most fields here can be updated directly on the profile.
Basic Information:
Field | Editable? |
First name | Yes |
Last name | Yes |
Date of birth | No – can only be changed via the Admin Panel |
Gender | Yes – options: Male, Female, Non-binary, Other, Prefer not to say |
Ethnicity | Yes – options: White, Black/African descent, Asian, Middle Eastern/North African, Indigenous/First Nations, Mixed/Multiple ethnic groups, Other, Prefer not to say |
Nationality | Yes – dropdown with an extensive list of nationalities |
Employee Identifiers
Field | Editable? |
Payroll number | Yes – only editable for your own account if you are a boosted user |
Employee number | Yes – only editable for your own account if you are a boosted user |
Contact Details
Field | Editable? |
Yes | |
Work phone | Yes |
Extension number | Yes |
Personal email | Yes |
Personal phone | Yes |
Home address | Yes |
Employment Details:
The Employment Details sub-section holds employment-related data. Most fields here are read-only in the front end and can only be updated via the Admin Panel.
Field | Editable? |
Start date | No – Admin Panel only |
Continuous start date | No – Admin Panel only |
Length of service | Calculated automatically – no edit |
Location | No – Admin Panel only |
Right to work status | No – Admin Panel only |
Visa / work permit status | No – Admin Panel only |
Probation period status | Yes – but not editable for your own account unless you are a boosted user |
Notice period | No – Admin Panel only |
Standard hours | No – Admin Panel only |
Note: To update any of the read-only fields above, go to Admin Panel > Users > Edit User and locate the relevant employee record.
Job Details:
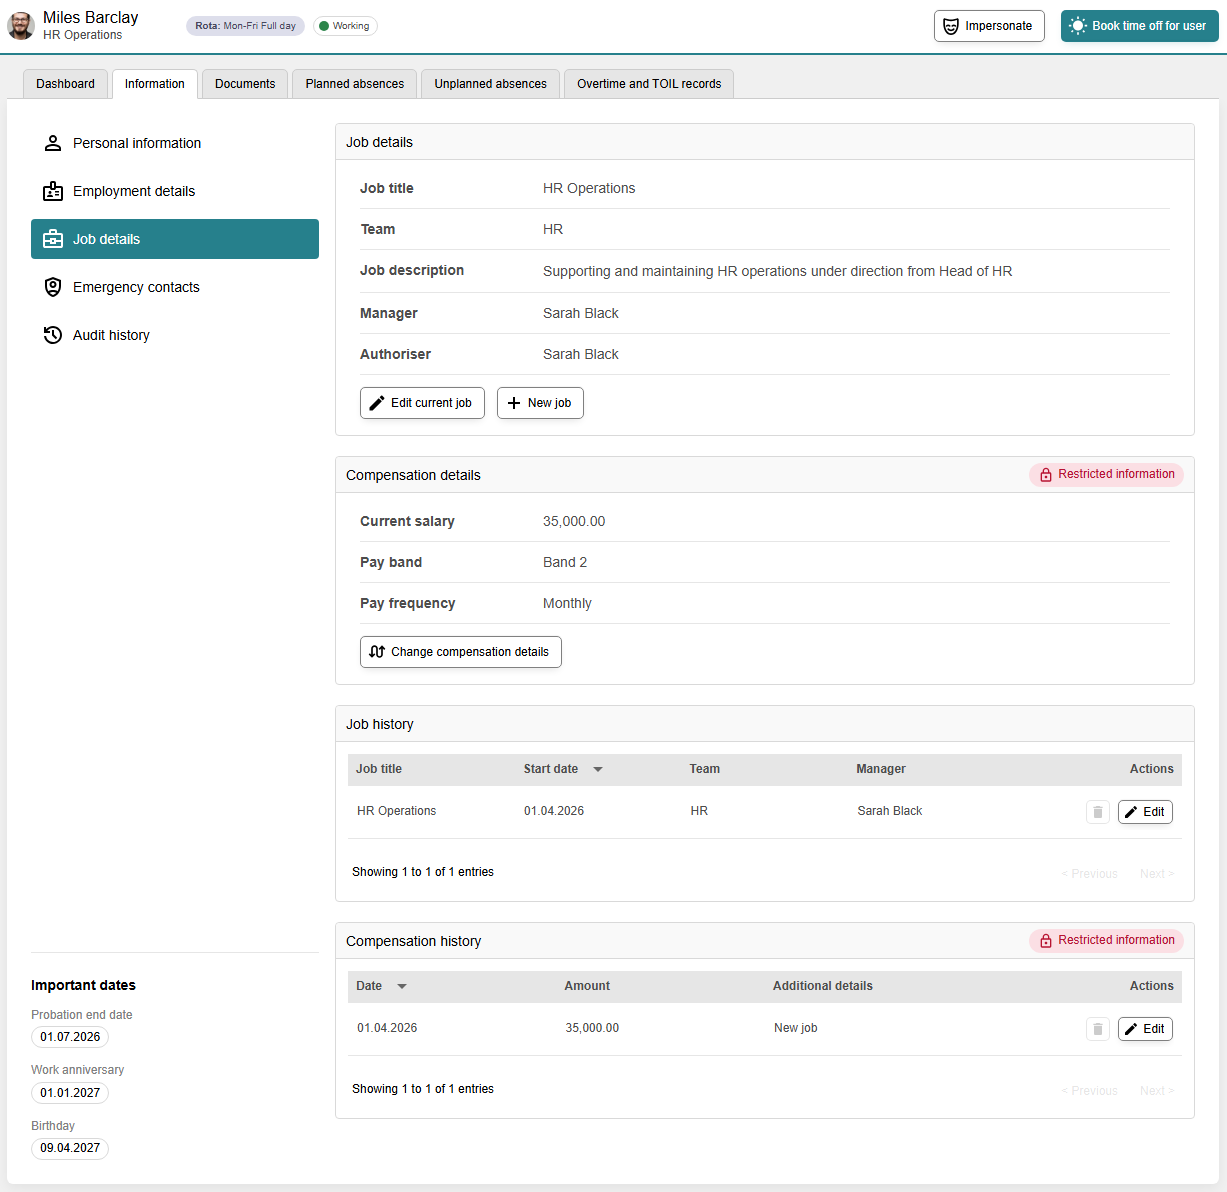
The Job Details sub-section shows the employee’s current job record as well as a full job history. The following fields appear on the current job record:
- Job title
- Employment type
- Team and other group assignments
- Manager
- Primary authoriser
- Job description
Job details cannot be edited for your own account unless you are a boosted user. When editing is permitted, changes are made through a modal rather than inline.
Job History
Below the current job record, a full job history is displayed as a list of versioned records. Each record shows a start date and, for past roles, an end date. A few things worth knowing:
- You can create future-dated job records. These will be applied automatically when their start date arrives.
- Past job records can also be edited if corrections are needed.
Compensation History:
Salary information lives within the Job Details section, under Compensation History. This gives you a versioned record of salary changes over time, each with an effective date, pay band, and pay frequency.
- Current salary – the employee’s current salary value.
- Pay band – the pay band the employee sits within.
- Pay frequency – options include Daily, Weekly, Every two weeks, Every four weeks, Twice per month, Monthly, Quarterly, and Annually.
This is one of the more sensitive areas of the system. A few things to be aware of:
- Who can see it – only users with the ‘Sensitive data viewer’ permission can view salary data. If someone doesn’t have that permission, the section is still visible on the profile, but shows a message confirming they don’t have access rather than displaying any figures.
- Employees and their own salary – employees can always see their own salary information, regardless of their role permissions.
- Making changes – updates to compensation are made through a pop-up window, and employees cannot edit their own salary record.
Compensation details cannot be edited for your own account unless you are a boosted user. Changes are made through a modal.
Good to know: Because salary data is restricted, it’s worth double-checking who in your organisation has the ‘Sensitive data viewer’ permission assigned. Your edays administrator can review this under Roles & Permissions.
Emergency Contacts:
This section holds details for up to two emergency contacts per employee – a primary and a secondary. You can store a name, relationship, phone number, and address for each.
The relationship options are: Spouse, Partner, Parent, Child, Sibling, Friend, or Other.
All fields here are editable, and employees are able to keep their own emergency contacts up to date themselves, which makes it easy to keep this information current without it always falling to HR.
Audit History:
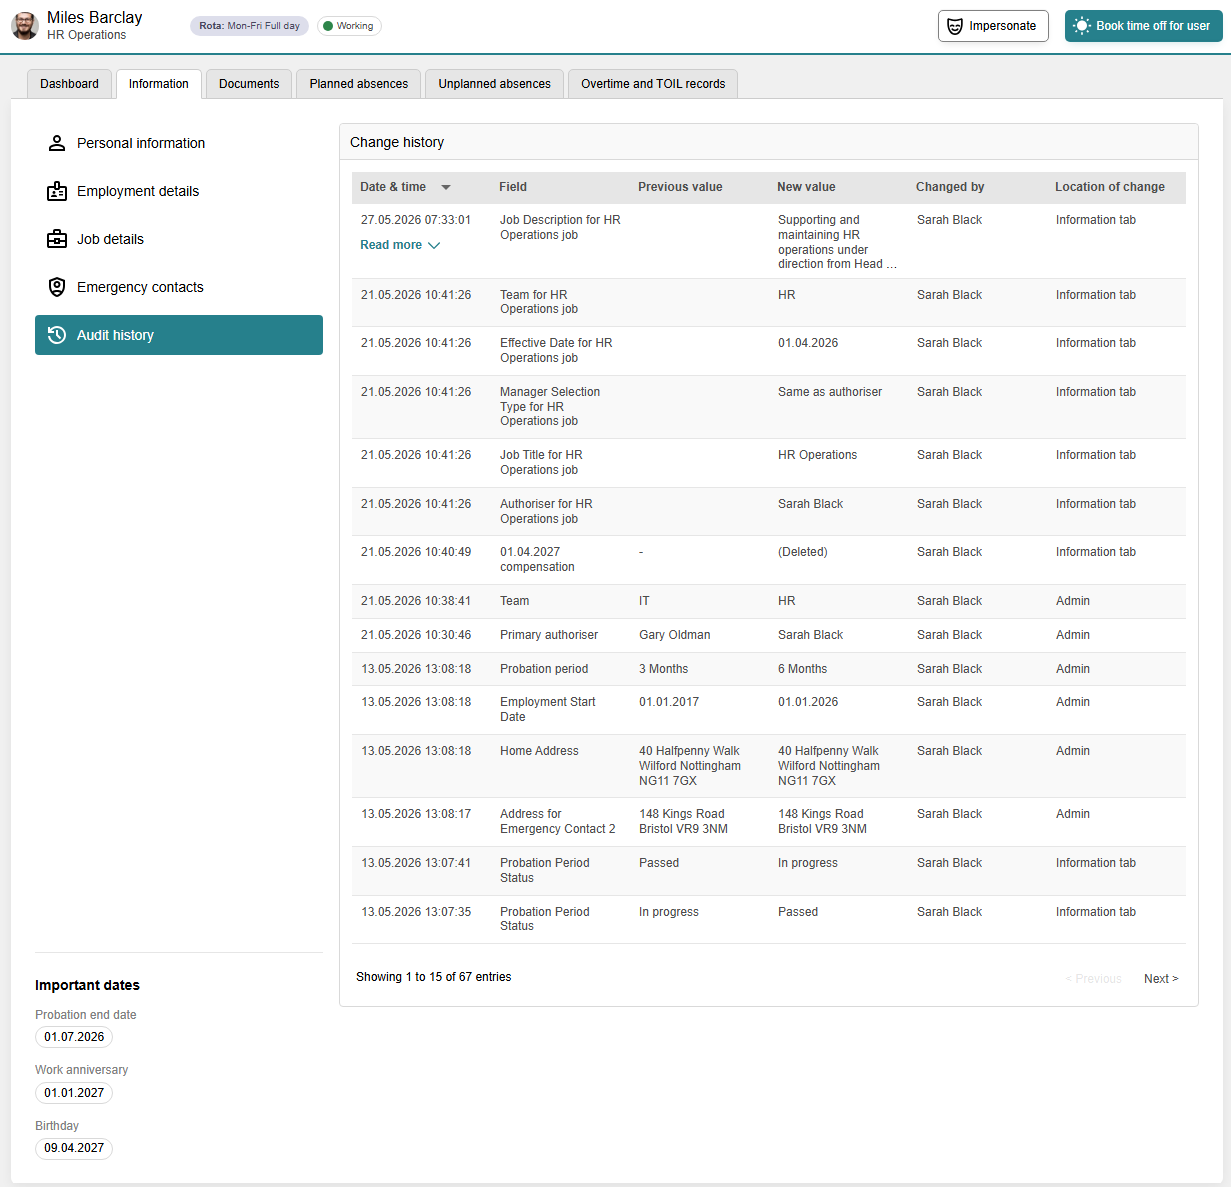
The Audit History section gives you a complete record of every change made to an employee’s profile – who changed what, when, and where the change was made. This is particularly useful for compliance purposes, resolving discrepancies, or simply keeping an eye on data quality.
For each change, you’ll be able to see the previous and new values, along with whether the update came from the Information tab, the Admin Panel, an integration, or an automated scheduled process.
- Date and time – when the change was made.
- Field – the name of the field that was changed. If multiple fields were updated in a single save, a separate entry appears for each. For versioned records (such as job records or compensation records), the field name includes context – for example, ‘Job title for Software Engineer job’ or ‘Pay band for 01/01/2025 compensation’.
- Previous value – the value before the change.
- New value – the value after the change. For deleted records, this displays as ‘(Deleted)’.
- Changed by – the user who made the change. Bulk updates show the admin who performed them. Changes made by scheduled processes appear as ‘Automated’.
- Location of change – where the change originated, such as ‘Information tab’, ‘Admin’, ‘Integration’, or ‘Scheduled update’.
Access: The Audit History section is only visible to users with the ‘Sensitive data viewer’ permission.
Custom Fields:
Your organisation may have additional fields configured in edays that are specific to your business – these will appear within the relevant sections of the Information tab alongside the standard fields.
If you’d like to add or modify custom fields, please contact your edays Customer Success Manager or raise a request with the Support team.
Further Reading
For more detail on related areas of Core HR, the following guides may be helpful:
- Getting Started with Core HR
- Roles & Permissions for Core HR
- Importing & Exporting Data
- Document Portal
- Assignments