Overview:
If you're not sure where to get started with Core HR, this article should give you everything you need to get things setup correctly for your business, and ensure all of your data is laid out correctly. As you're likely storing lots of personal data and documents, it's important to ensure you have all the right settings and roles applied before adding any sensitive data into the system, such as salaries.
We'd typically recommend approaching a new setup in this order:
- Update your role permissions
- Update/Import Personal Data
- Configure Document Portal
- Configure Personal Documents
- Org Chart
- Assignments
- Workflows & Email Alerts
Watch Core HR for Admin
Note: Core HR is an additional module. If you do not have this enabled, please contact customersuccess@e-days.com to request Core HR.
Update your Roles & Permissions:
You should first check your roles to understand which permissions have been enabled.
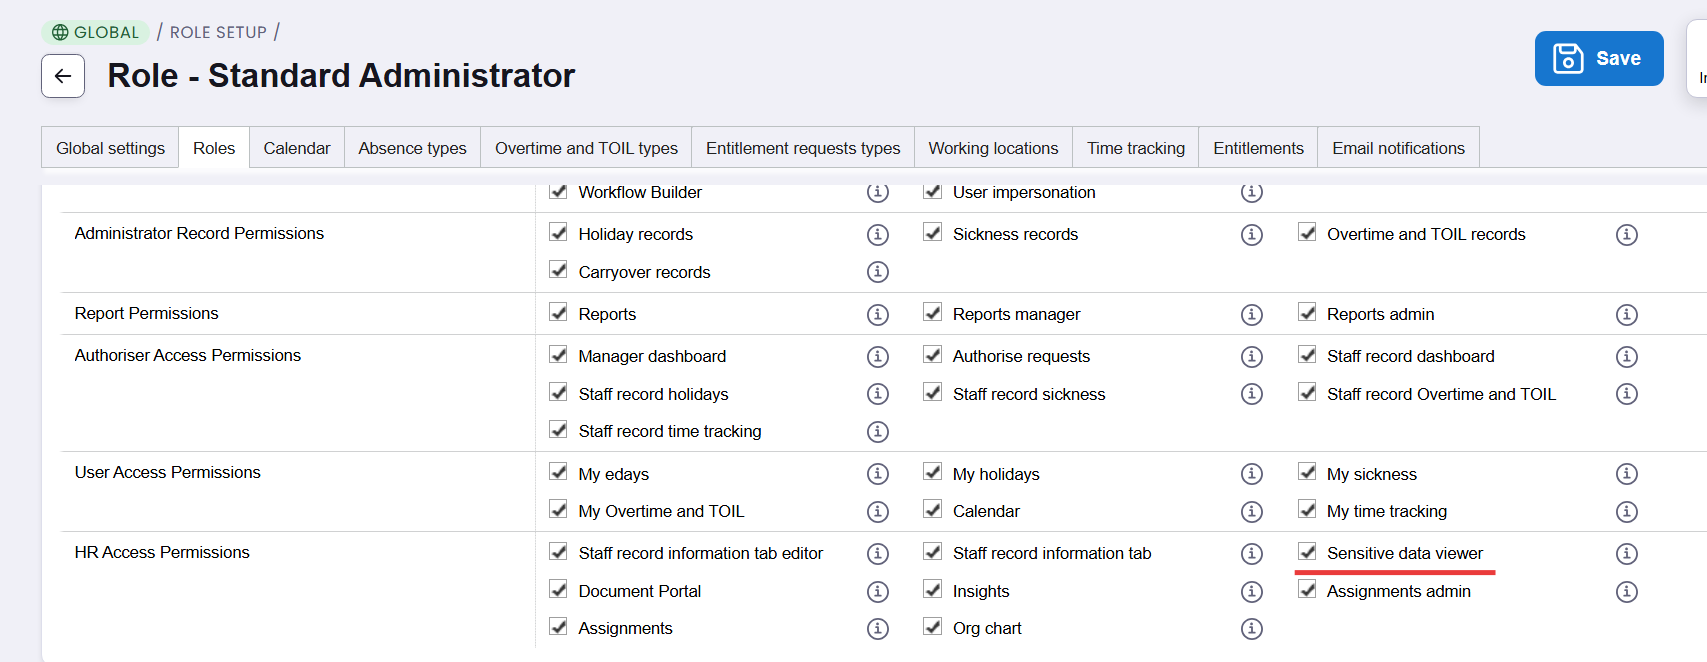
The most important permission we recommend checking on any Administrator or Authoriser type roles is 'Sensitive data viewer'. This controls who can see Salary information on the employee profile, and any historic salary changes.
- Go to Admin Panel > Global > Roles
- Edit any existing roles, and click Advanced to see all the permissions for that role.
- If you're unsure, we'd recommend creating a new role for this permission, and assigning that to the specific people in the business who should see sensitive data, such as system owners or the HR team.
- You'll also be able to disable or enable Core HR for any specific users if necessary, by going to their User Profile > User Settings & at the bottom you'll find the 'Enable Core HR' setting as Yes/No. By default, it will be enabled if you're using Core HR.
Our guide on setting up Roles & Permissions for Core HR can be found here.
Update/Import Personal Data:
Core HR allows you to store various personal information against every user record, and it's a very straight forward task to edit a user's profile manually in the system. However, when setting up for the first time, you may find it easier to import the data from a csv file.
Manually updating a profile
- In the front-end, find a user's profile or click My Team to search for a specific person.
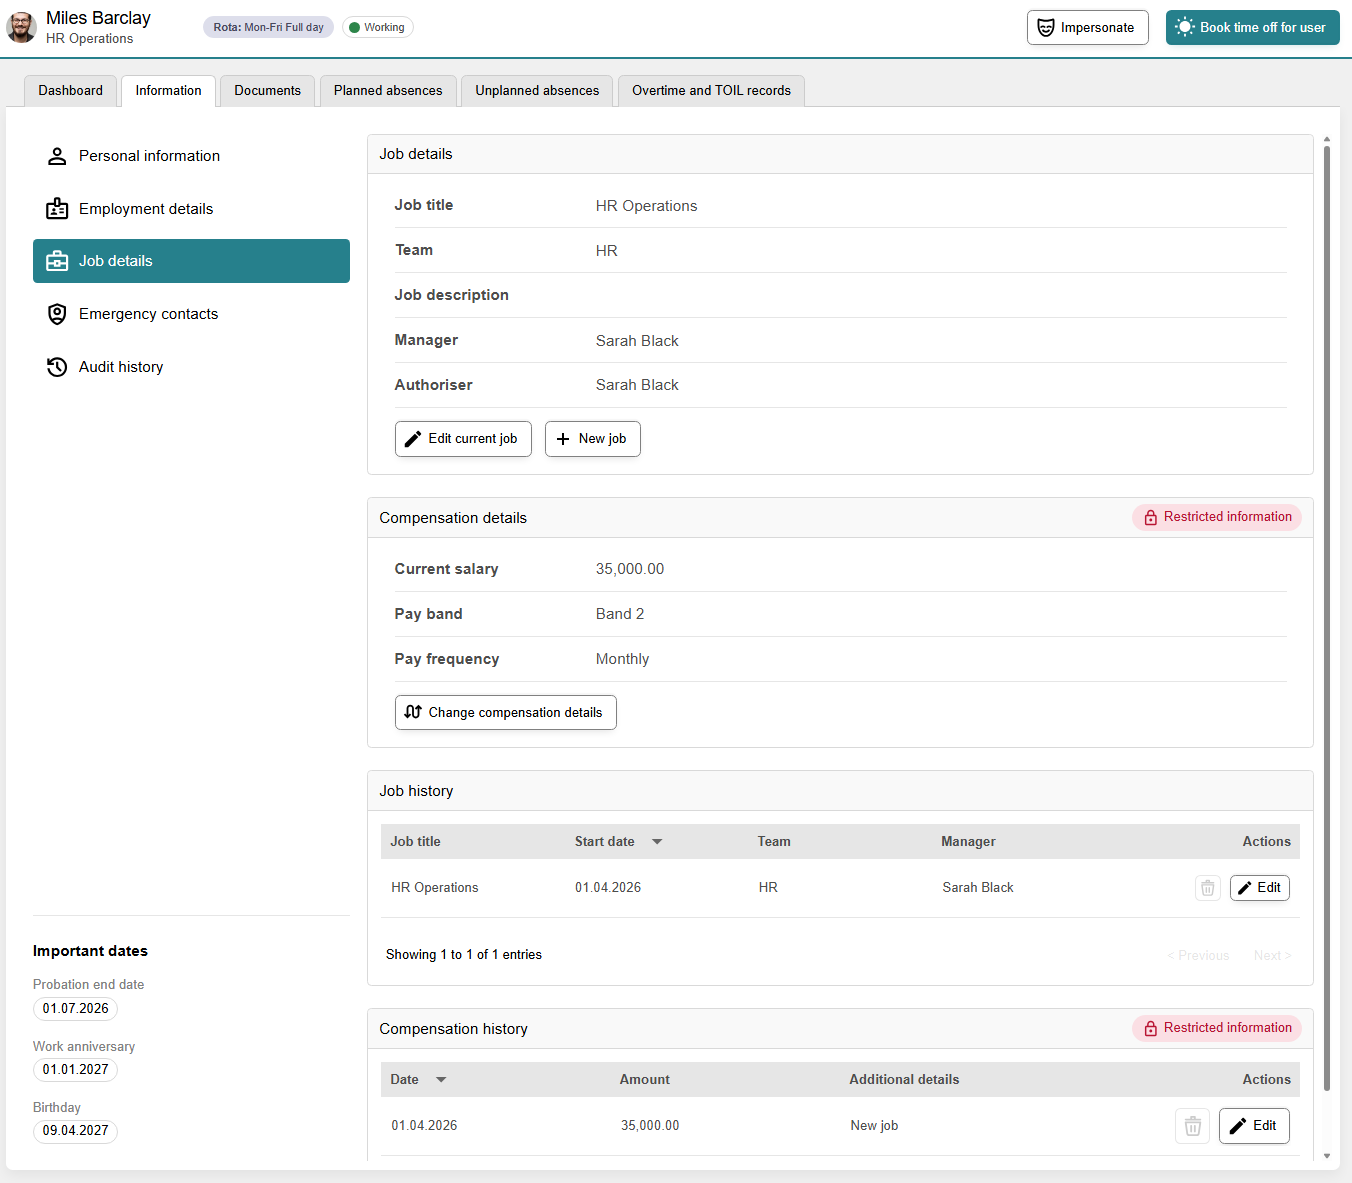
- On the Information tab (if you have the Staff Record information tab editor permission), you can edit any relevant fields on their profile.
- Audit history will show you every change that has happened, who did it, and when.
- Compensation & Salary details are locked down and restricted to users with the 'sensitive data viewer' permission. Users can also see their own salary in the system.
- Note: You can allow users to update their own personal information and emergency contacts.
To do a bulk import, you'll need to use our Import/Export Tool.
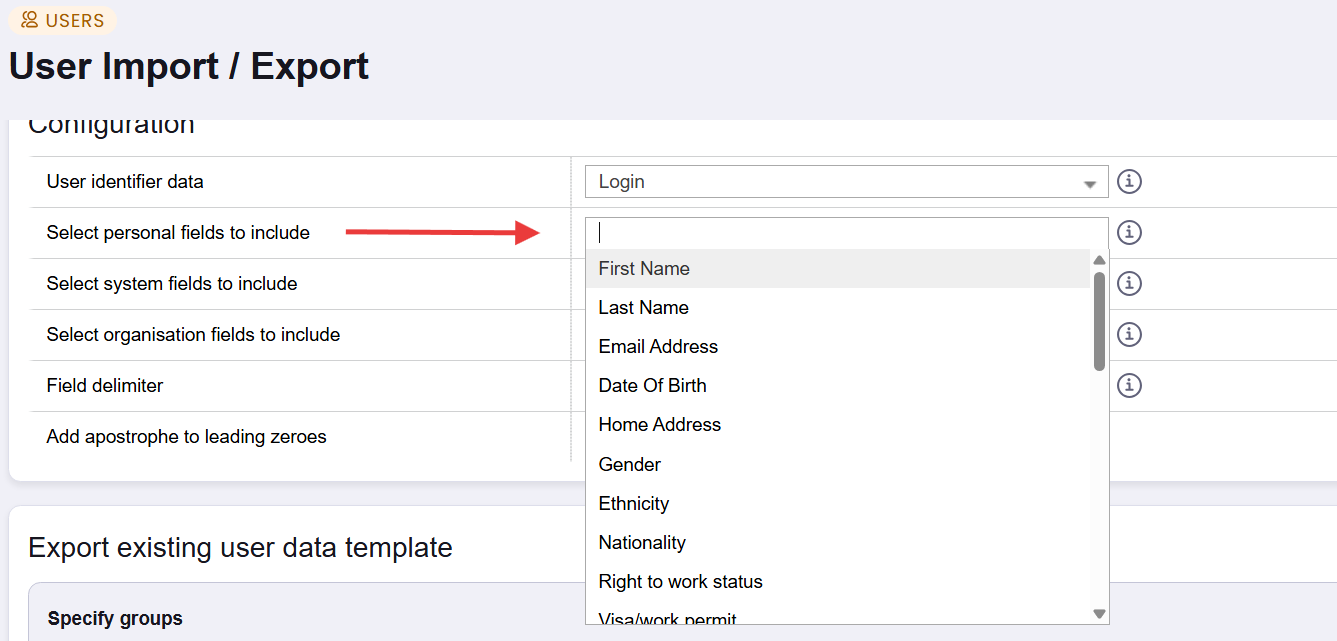
- Go to Admin Panel > Users > Import/Export
- We recommend exporting a file first, and then using this to build your information before re-importing. To do this, select a user identifier, and then any personal fields you want to include.
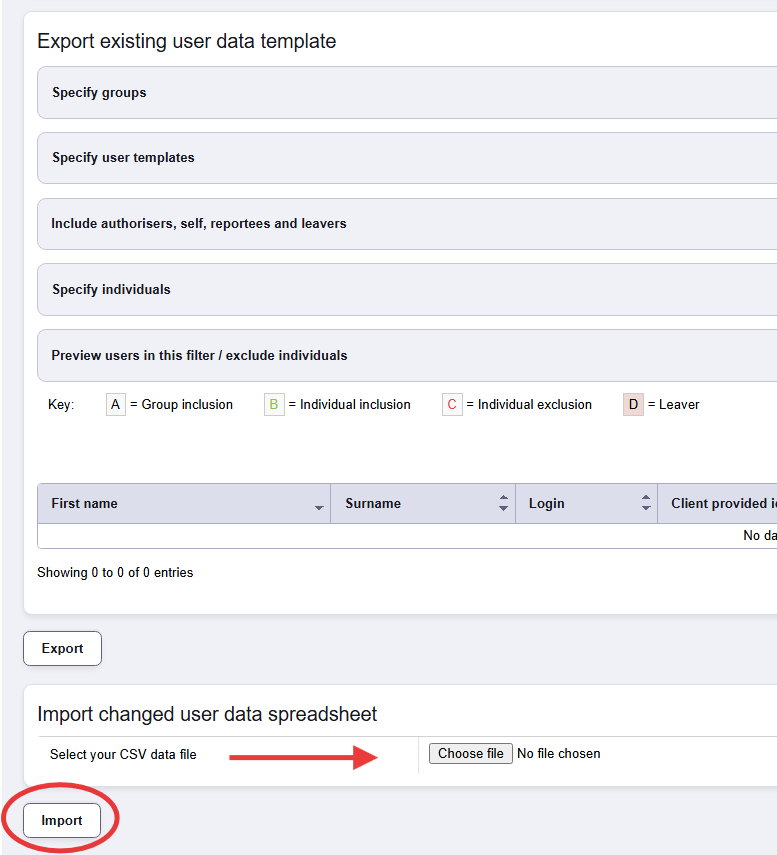
- Specify which Groups or Templates you want to export, and then click Export at the bottom of the screen. This will download a csv file for you to use.
- After you have edited your csv file, you can then choose that file to import on the same page. The system will tell you if that has loaded successfully, or it there were any errors. If you do have any issues with this process, please do raise a ticket with the Support Team.
Our guide on importing & exporting data from edays can be found here.
Configure Document Portal:
The document portal is your centralised hub in edays where employees can access company wide policies, or specific handbooks that you want to ensure everybody has easy access to.
The document portal allows you to configure various folders and viewing permissions, so you can personalise the central directory to different groups of users. For example, you may have employees from different countries who need a different employee handbook, or a specific country related policy only relevant to a sub section of users.
- Employees can access the Document portal from their 'My Tools' selection.
- Recommended use cases; Employee handbooks, company policies, benefits and rewards
We'd recommend following this guide to configure and add documents in the portal.
Configuring Personal Documents:
As part of the Core HR implementation, you may want to start uploading personal contracts to each employee's profile, or any important documents such as right to work certificates, disciplinaries, or anything else which you want to keep stored in a secure location for that employee.
You'll first want to create a folder structure for personal documents:
- Go to Front end > My Team > Any User
- On the Documents tab, you can start to create your folder structure. Create a new folder, and then select whether this is visible to the User, the Manager, or none at all. For example, our HR Confidential Folder is not visible to users or managers, so only somebody with HR Access permission can see it.
- We recommend following a structure like this, but you can create as many folders as you like. This folder structure will then be visible on every employee profile throughout the system.
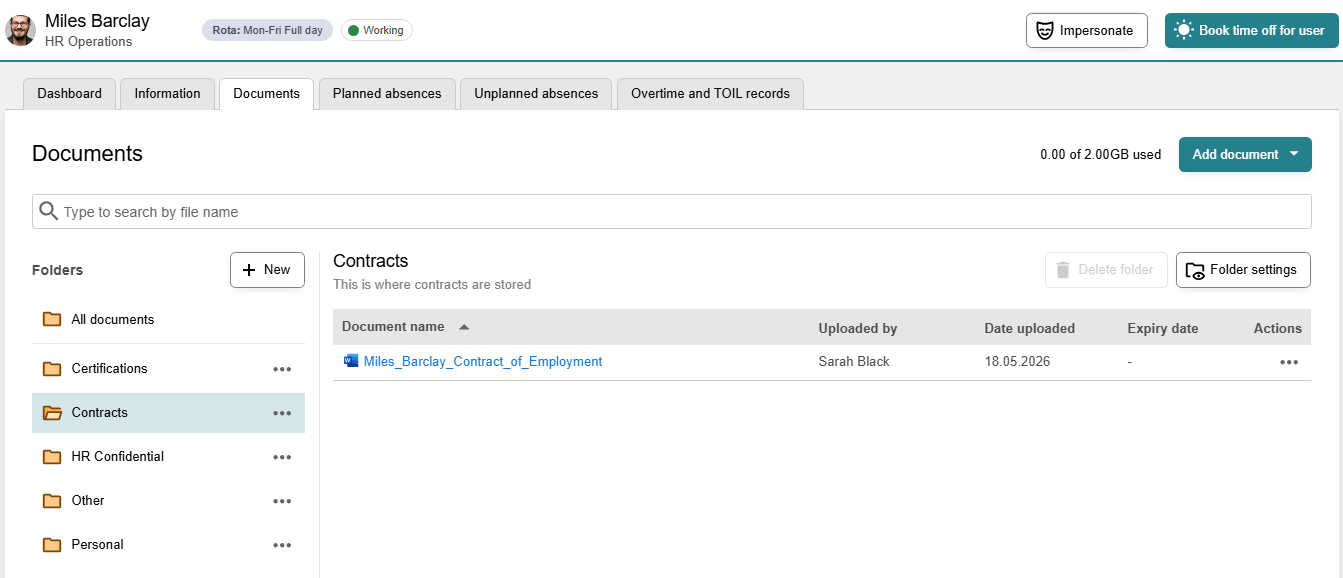
Once you've created your folder structure, you can upload documents to each employee profile:
- We recommend first uploading key documents like contracts or specific employee documentation such as rights to work.
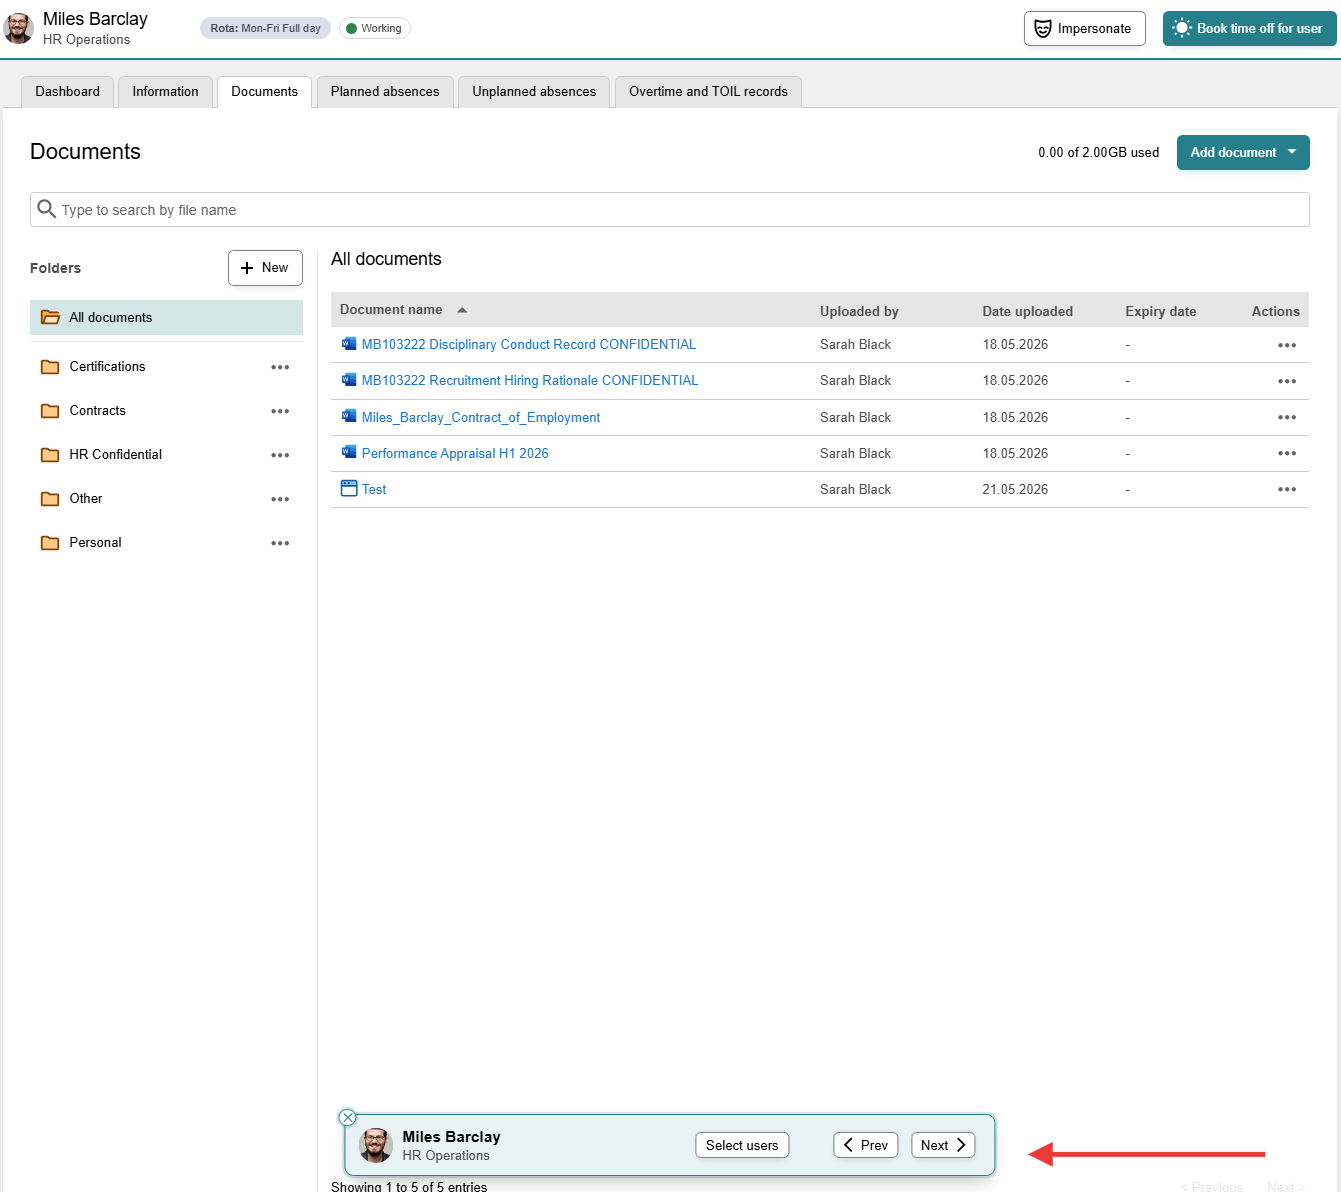
- You can use the My Team modal to quickly cycle through employees if you're adding multiple documents at the same time to multiple employees.
Org Chart:
The org chart is a dynamic and live view of your current workforce, showcasing the organisational structure based on authorisers and managers in edays. By default, this view will be based on your primary authoriser - however you have the power to override this and assign a 'Manager' per profile if required. When you first open the org chart, it may not look exactly correct due to different authorisers.
To specify a user's manager in the system:
- Go to Admin Panel > Users > Edit User
- On their profile, scroll down to Job details and select Manager
- If you select Specify manager, you can choose who they report to on the org chart, instead of their primary authoriser.
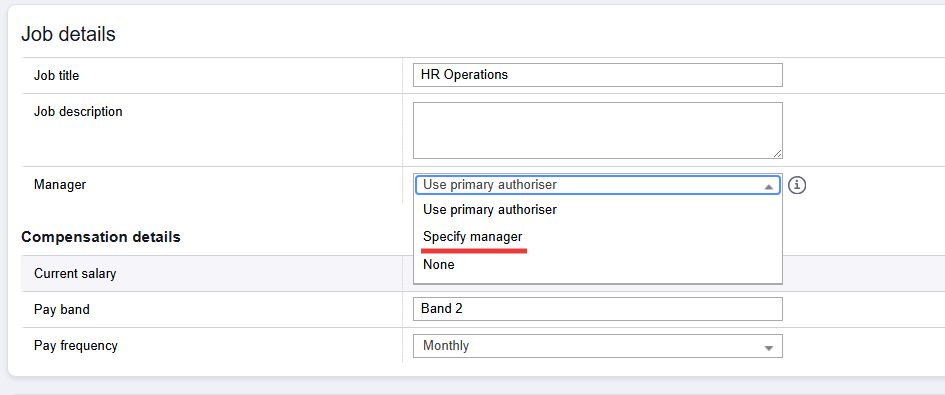
For any more information on how the org chart works, you can read the full guide.
Assignments:
As part of our Core HR module, you can use Assignments in edays to send out important policies and documents to your teams, in order to ensure they have read and understood the document, policy or task, with a declaration.
You can create an assignment from any document in edays, configure automatic reminders and have a clear audit trail of who has completed it or not.
- Send out policies for acknowledgement from staff
- Ensure you have a clear audit trail of who has completed what, and when.
- Assignments support you with internal and external driven policy changes
For a full guide on how to use Assignments, you can read more here.
Workflows & Automation/Alerts:
With all your new data, you can start to automate and generate alerts at key moments around the business.
For example, if you want the managers to proactively schedule their upcoming probation review meeting with their new starter, trigger a workflow to send a reminder 14 days before the end date.
Or if you want to be alerted when key profile changes are made, such as a home address update made by the employee - send an email to the payroll and HR teams to make them aware.
You can access Workflow Builder from the Admin Tools > Workflow Builder. Just click Add new workflow and start building.
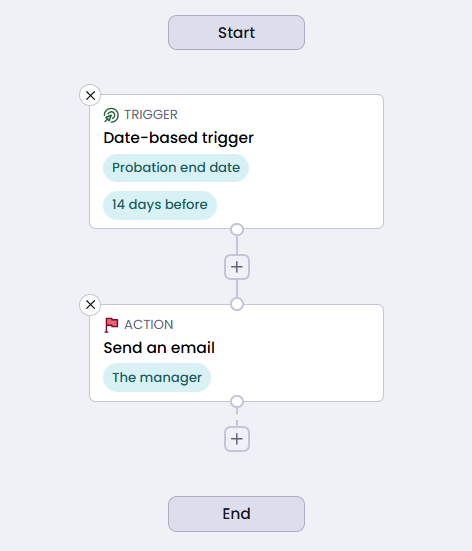
You can create a whole range of different workflows that aren't just limited to Core HR.
For a full guide on how to use Workflows with Core HR, you can read more here.
Further Reading & Videos
For more detail on related areas of Core HR, the following guides may be helpful:
- Roles & Permissions for Core HR
- Assignments & Policies
- Document Portal
- Personal Information
- Org Chart
- Workflows & Alerts
Watch Core HR for Admin